Node Types
Wait Node
Description of your new file.
The Wait Node lets you pause the workflow before proceeding to the next step. This is useful when you want to introduce a delay or wait until a specific date and time before sending a message or continuing the flow.
When you click on the Wait Node, a configuration panel appears with a Parameters tab. Here, you can choose how the wait should be defined:
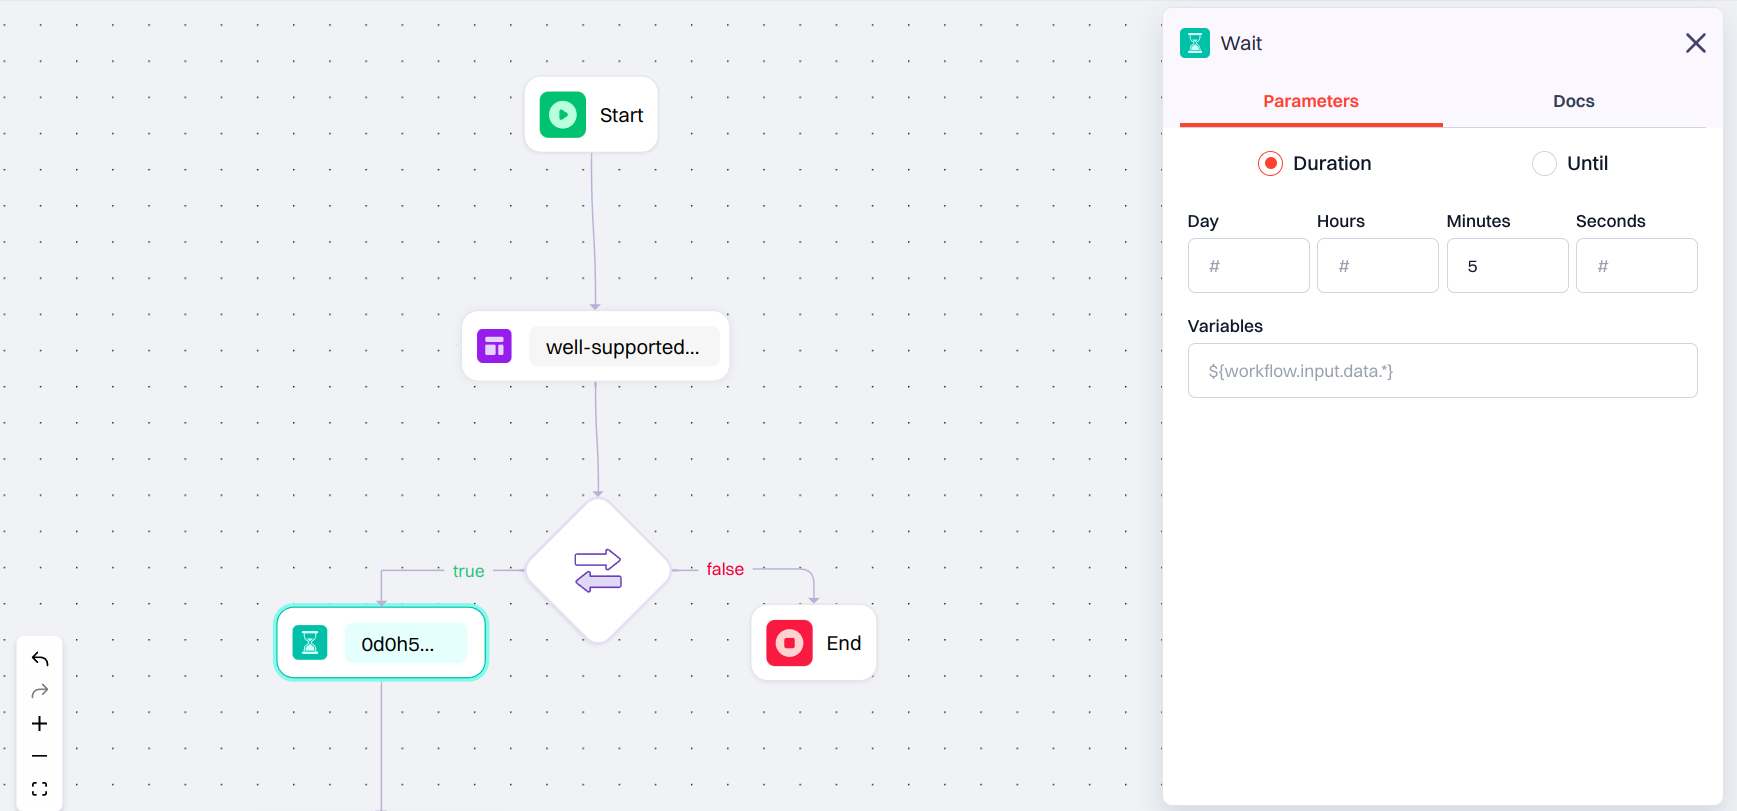
Configuration Options
-
Duration: Set a fixed delay using:
- Days
- Hours
- Minutes
- Seconds
-
Until: Define a specific date and time when the workflow should resume.
- Select a Time Zone to align the timing with the recipient’s or system’s locale.
Advanced Workflow Configuration
In Advanced workflows, an extra field appears below the static options:- Wait Variable: A field to enter a dynamic wait value using a JSON path.
- Example:
${workflow.input.data.time}
- Example:
If you use a Wait Variable, it will override whatever you set in Duration or Until. Just make sure the variable returns a valid time value — like a number in seconds or a proper date/time — so the workflow knows how long to wait.