Node Types
Control Node
Description of your new file.
Control nodes help your workflow make decisions and branch based on conditions or variable values. Siren currently supports two types of control nodes:


- If Node — used for binary conditions (true/false paths)
- Switch Node — used for multi-branch routing based on values
If Node
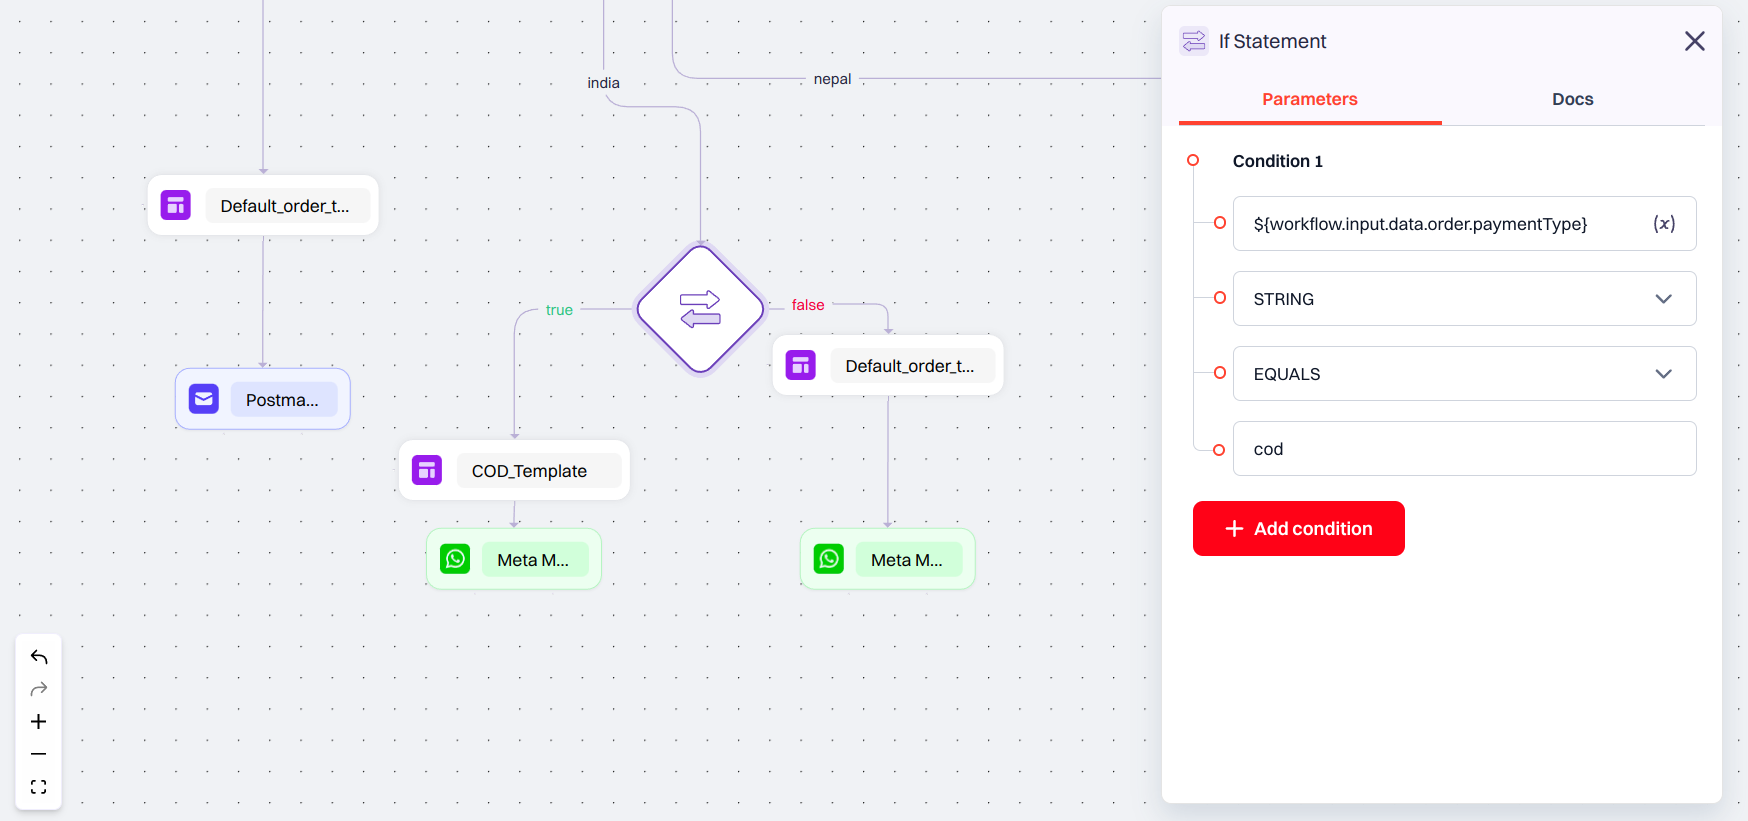
The If Node allows you to define one or more conditions, and split the workflow based on whether the condition(s) evaluate to true or false.
Basic Workflow Configuration
In a Basic workflow, you can configure only one condition. Each condition has the following fields:- Value A – This is the input source, typically a JSON path pointing to data pulled from your system, database, or even a prior node.
- Type – The expected data type for comparison, such as
STRING,NUMBER, orBOOLEAN. - Comparison Operator – How you want to compare the two values. Options include
EQUALS,NOT EQUALS,GREATER THAN, etc. - Value B – The reference value you’re comparing against. This is usually the value entered by the user or a static condition.
Advanced Workflow Configuration
In an Advanced workflow, the If Node becomes more powerful. You can:
- Add multiple conditions
- Combine them using AND / OR logic
- Use dynamic data from external APIs or workflow input using JSON paths
Example
Imagine you need to send notification to a user whose ID is verified and check their country if India use one provider, if USA use another provider. So use the if node in advanced workflow for this.You can configure the If Node like this:
- A user submits their country, and if their ID is verified or not verified.
- Your backend fetches the corresponding details of the user from the database and passes it to Siren.
This checks if the submitted country matches the required one. The other branch can look like this, where Value A fetches from the database whether the person’s ID is verified or not.
- Value A:
${workflow.input.data.country}(value retrieved from your database)- Type:
STRING- Operator:
EQUALS- Value B:
India(the Country the user entered)These conditions can then be combined using AND logic — so the workflow proceeds only if both checks pass.
- Value A:
${workflow.input.data.verification}- Type:
STRING- Operator:
EQUALS- Value B:
verified
Switch Node
The Switch Node is used to split the workflow into multiple paths based on the value of a variable, similar to aswitch-case logic in programming.
Basic Workflow Configuration
In Basic mode, the switch has a Name field and allows defining up to 9 cases, including a default (fallback) case.
- Each case is a static value.
- You can route each case to a different set of nodes.
- The default route will be used if no match is found.
Advanced Workflow Configuration
In an Advanced workflow, you’ll see a Switch Expression field instead of a name.
- Enter a JSON variable path (e.g.,
${workflow.input.data.}) to evaluate dynamically. - Add up to 9 cases to match the expression.
- Just like in Basic mode, one fallback case is always present by default.
Example
Suppose you want to notify users based on their preferred channel.This allows you to streamline multi-channel workflows in a clean, organized way.
- Use
${workflow.input.data.channel}as your Switch Expression- Add cases like
sms, andpush- Connect each case to the respective channel’s template node
- Let the fallback case handle any unknown or missing channel values