Workflows
Create Workflow
Learn how to create a new workflow and configure different types of nodes
Create Workflow
This page explains how to create a new workflow in Siren and gives an overview of the Workflow editor.1
Navigate to My Workflow
After logging into Siren:Click My Workflow in the left navigation panel.
- You’ll see a list of all existing workflows, including both Drafts and Published.
- Use the search bar or apply filters to quickly find specific workflows by name, tag, or status.
In the Workflow list, you’ll find Clone and Duplicate options under the Actions column.
- Duplicate Workflow creates a copy of the selected workflow within the same environment.
- Clone Workflow lets you copy the workflow to a different environment, such as from staging to production.
2
Add a New Workflow
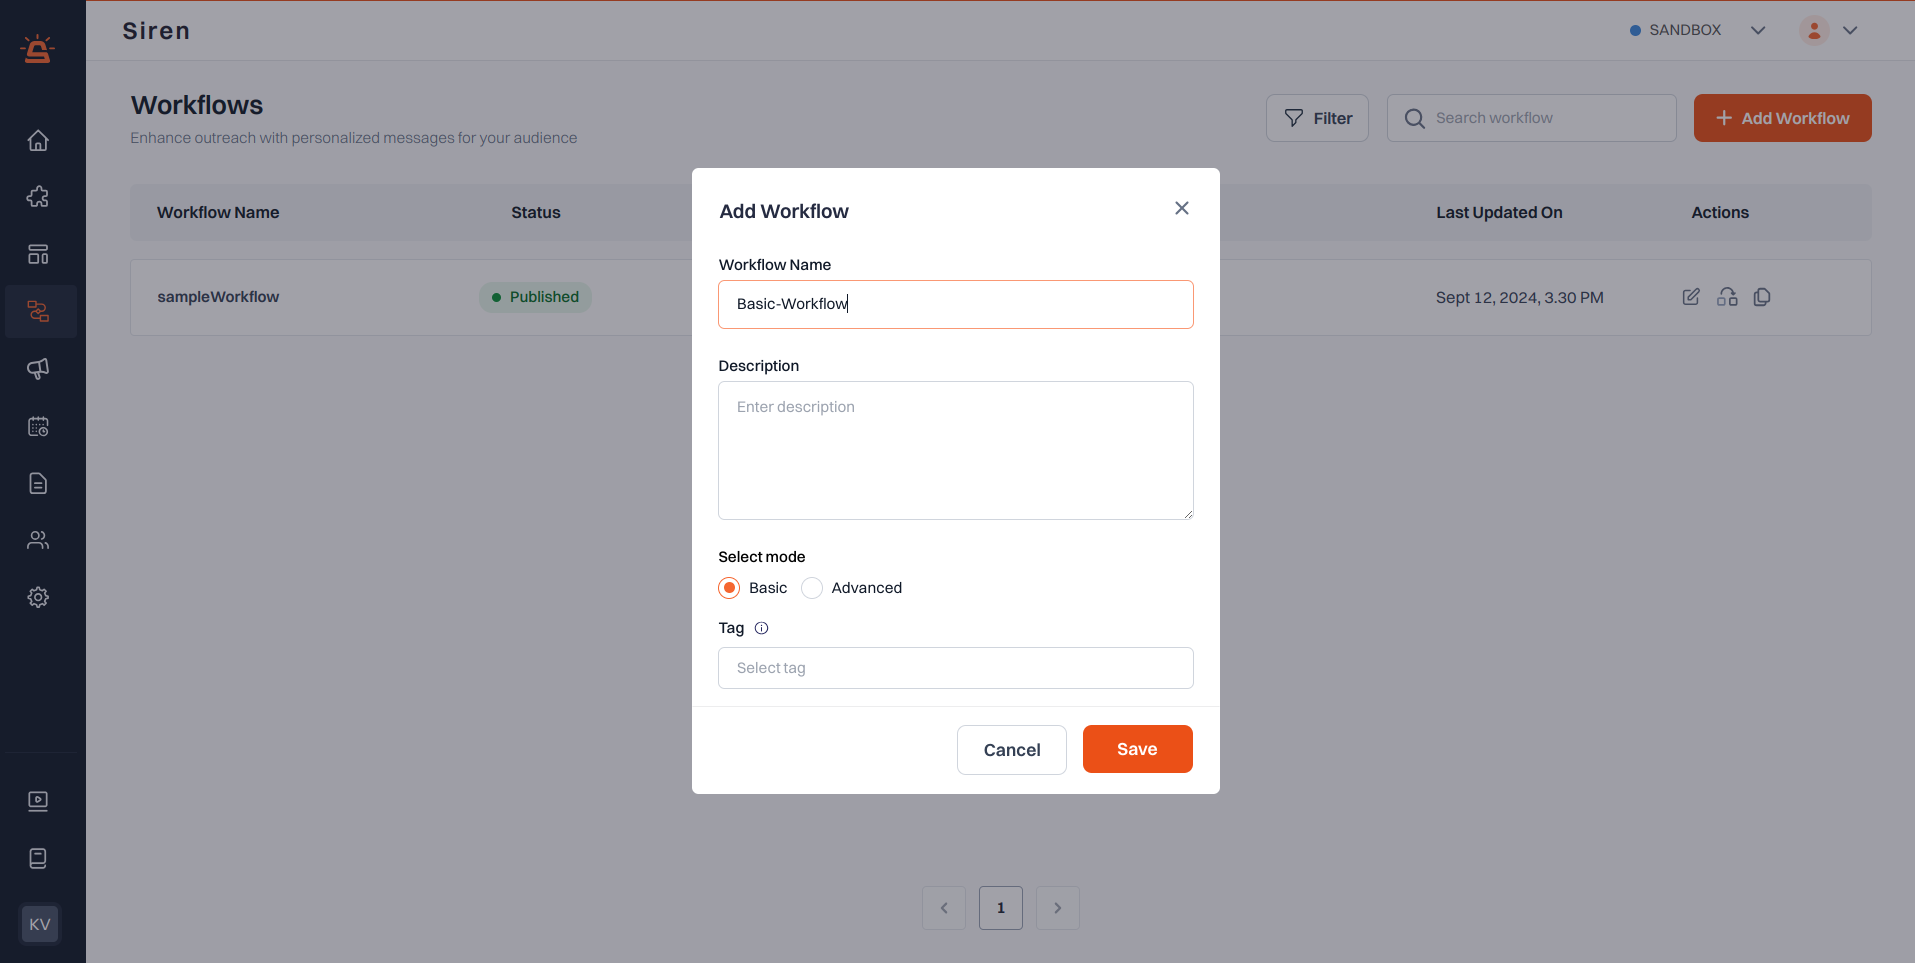
Click the + Add Workflow button on the top right. This opens a modal where you need to enter:
You will now be redirected to the Workflow Editor, where you can begin building the flow.
- Workflow Name – A unique name to identify your workflow.
- Description (optional) – Brief explanation of what the workflow does.
- Workflow Type – Select Basic or Advanced.
- Tag – Add one or more tags to organize and group related workflows.
You will now be redirected to the Workflow Editor, where you can begin building the flow.
Workflow Editor UI
Once you’ve created and saved a workflow, you’ll enter the Workflow Editor, a visual interface where you can design, test, and configure your workflow. At the top-right corner, you’ll find the Publish button. Use this to make the workflow live once you’re ready.
Near the top-left, beside the workflow name, you can access Version History to view or revert to earlier versions of the workflow.
At the top-right corner, you’ll find the Publish button. Use this to make the workflow live once you’re ready.
Near the top-left, beside the workflow name, you can access Version History to view or revert to earlier versions of the workflow.
Editor Layout
The editor starts with a single Start Node, which is fixed and cannot be modified. All nodes are added from this starting point. To add a new step, click the+ icon below any node. This opens a list of available nodes (such as Wait, If, Switch, HTTP, Chat, Template or Provider). Depending on whether you’ve created a Basic or Advanced workflow, the available nodes may differ, but all compatible options are shown in the list.
We cover node types and their behavior in more detail in the Node configuration page.When you’re done building your flow, head to the top-right corner and click Publish to push the workflow live. Need to check what changed or roll back to an older version? You’ll find Version History next to the workflow name on the top-left — perfect for tracking edits as your workflow evolves.
Test Mode
You can toggle between Editor and Test mode at the top of the screen.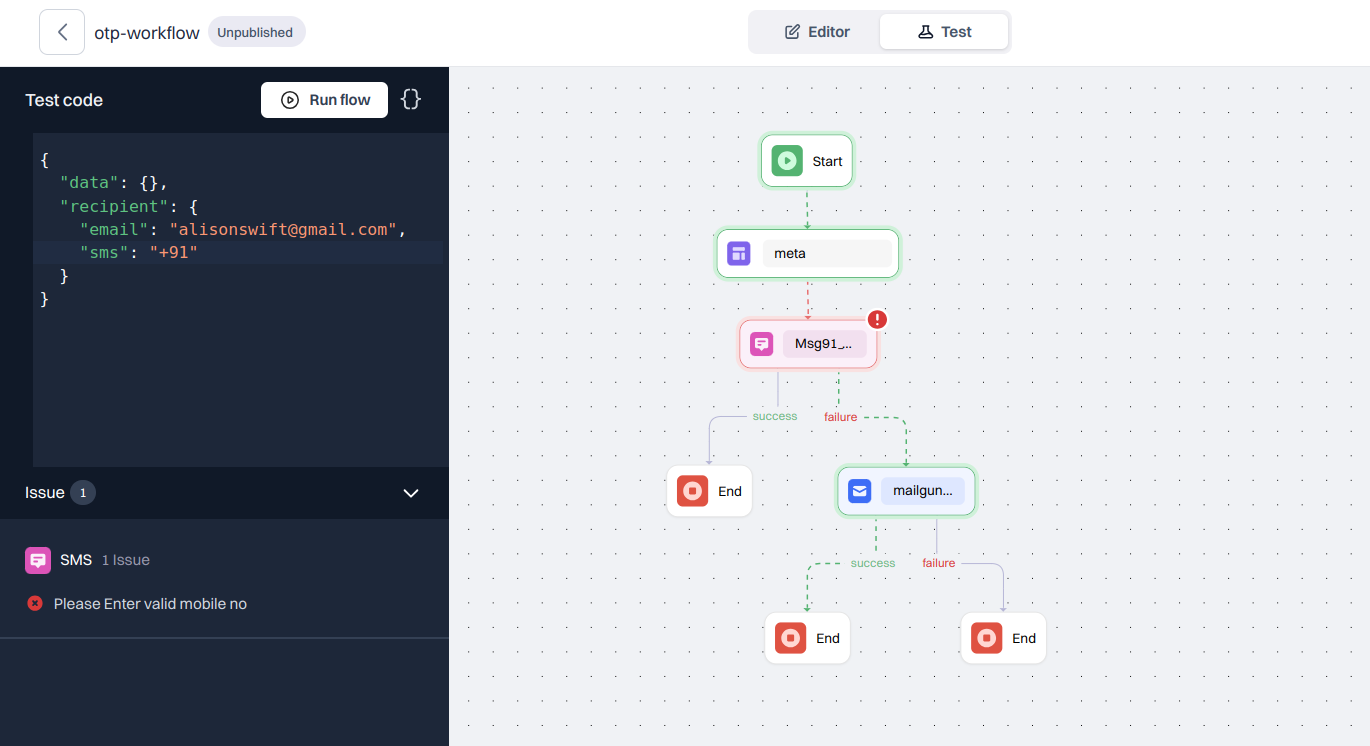
- Editor Mode lets you build and edit the workflow.
- Test Mode allows you to simulate how the workflow would run using mock data.
Input JSON Panel
Whether you’re in Editor or Test mode, you’ll have access to the Input JSON panel. The input JSON is divided into two keys:
data: Custom data used inside nodes or for conditionsnotify: Recipient details mapped to various channels