> ## Documentation Index
> Fetch the complete documentation index at: https://docs.trysiren.io/llms.txt
> Use this file to discover all available pages before exploring further.
# Create Workflow
> Learn how to create a new workflow and configure different types of nodes
# Create Workflow
This page explains how to create a new workflow in **Siren** and gives an overview of the Workflow editor.
After logging into Siren:
Click **My Workflow** in the left navigation panel.
* You will see a list of all existing workflows, including both **Drafts** and **Published**.
* Use the **search bar** or apply filters to quickly find specific workflows by name, tag, or status.
In the Workflow list, you will find **Clone** and **Duplicate** options under the **Actions** column.
* **Duplicate Workflow** creates a copy of the selected workflow within the **same environment**.
* **Clone Workflow** lets you copy the workflow to a **different environment**, such as from staging to production.
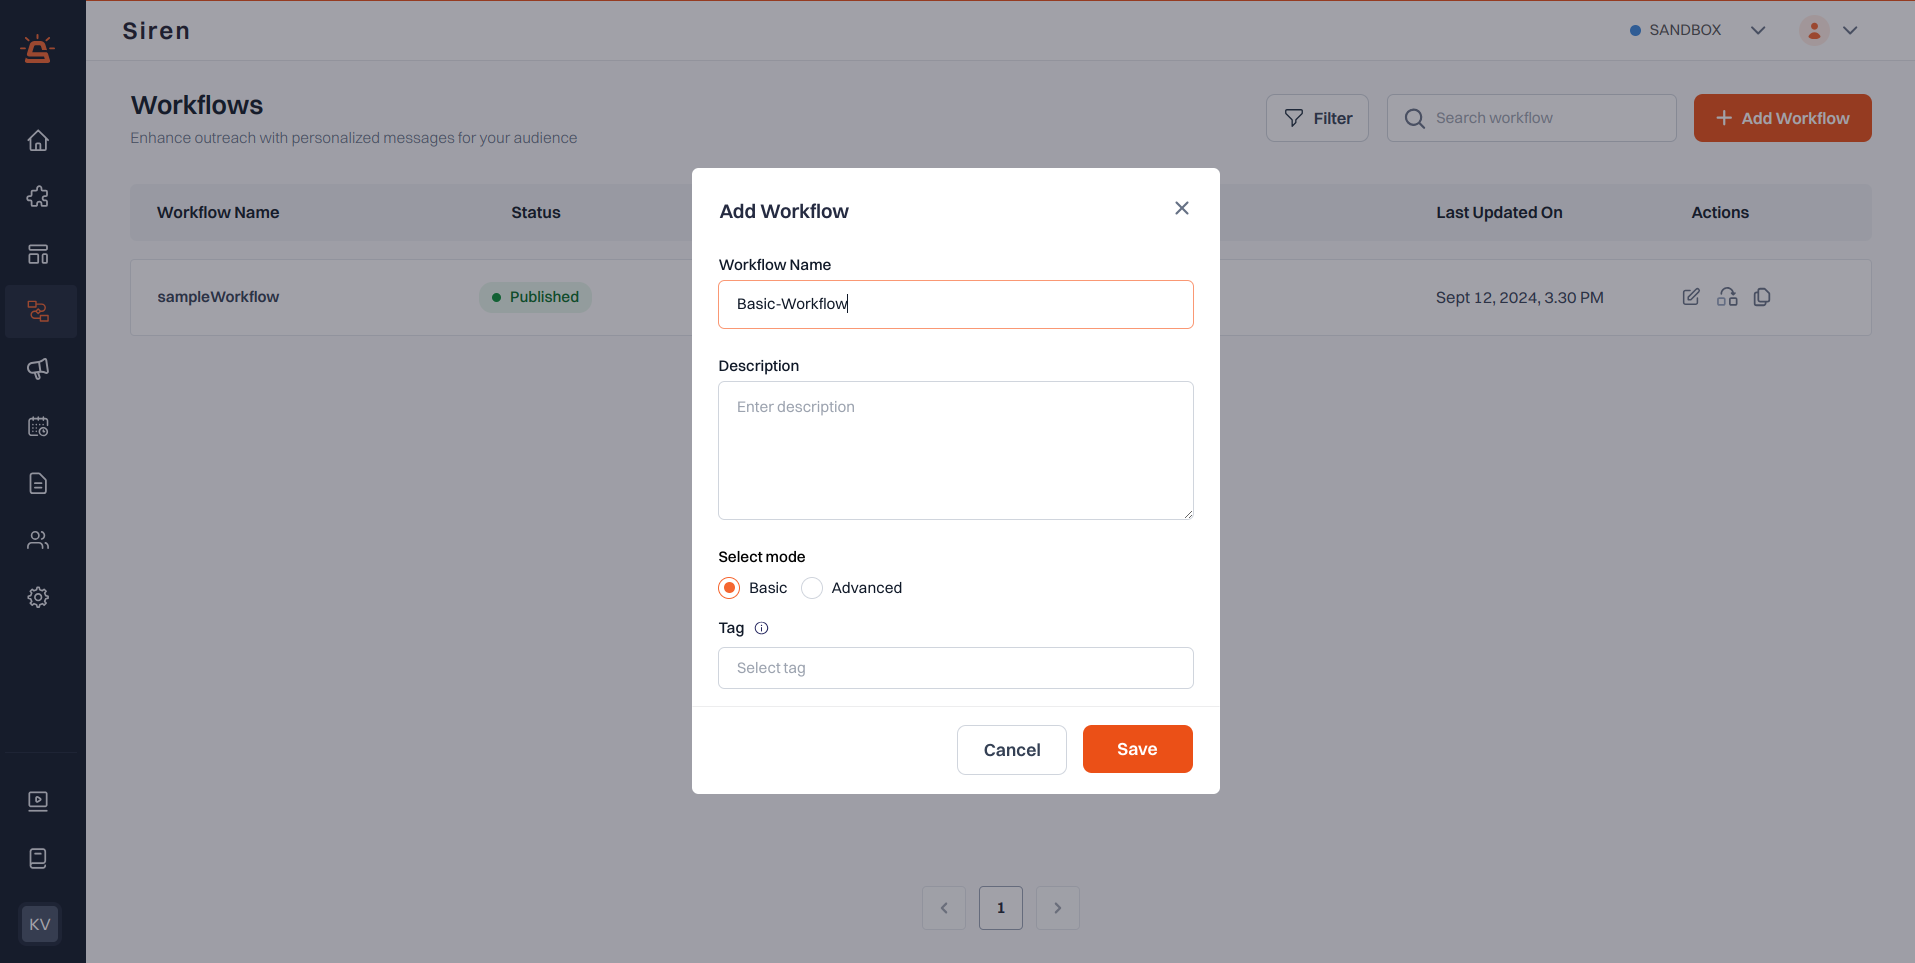
Click the **Add Workflow** button on the top right. This opens a modal where you need to enter:
* **Workflow Name** – A unique name to identify your workflow.
* **Description** *(optional)* – Brief explanation of what the workflow does.
* **Workflow Type** – Select **Basic** or **Advanced**.
* **Tag** – Add one or more tags to organize and group related workflows.
Click **Save** to continue.\
You will now be redirected to the **Workflow Editor**, where you can begin building the flow.
##  # Workflow Editor UI
Once you have created and saved a workflow, you will enter the **Workflow Editor**, a visual interface where you can design, test, and configure your workflow.
# Workflow Editor UI
Once you have created and saved a workflow, you will enter the **Workflow Editor**, a visual interface where you can design, test, and configure your workflow.
 At the **top-right corner**, you will find the **Publish** button. Use this to make the workflow live once you are ready.
Near the **top-left**, beside the workflow name, you can access **Version History** to view or revert to earlier versions of the workflow.
## Editor Layout
The editor starts with a single **Start Node**, which is fixed and cannot be modified. All nodes are added from this starting point.
To add a new step, click the `+` icon below any node. This opens a list of available nodes (such as Wait, If, Switch, HTTP, Chat, Template or Provider). Depending on whether you have created a **Basic** or **Advanced** workflow, the available nodes may differ, but all compatible options are shown in the list.
> We cover node types and their behavior in more detail in the [Node configuration](/docs/Workflow/NodeConfiguration/NodeConfiguration) page.
When you are done building your flow, head to the **top-right corner** and click **Publish** to push the workflow live.
Need to check what changed or roll back to an older version? You will find **Version History** next to the workflow name on the **top-left** — perfect for tracking edits as your workflow evolves.
***
## Test Mode
You can toggle between **Editor** and **Test** mode at the top of the screen.
At the **top-right corner**, you will find the **Publish** button. Use this to make the workflow live once you are ready.
Near the **top-left**, beside the workflow name, you can access **Version History** to view or revert to earlier versions of the workflow.
## Editor Layout
The editor starts with a single **Start Node**, which is fixed and cannot be modified. All nodes are added from this starting point.
To add a new step, click the `+` icon below any node. This opens a list of available nodes (such as Wait, If, Switch, HTTP, Chat, Template or Provider). Depending on whether you have created a **Basic** or **Advanced** workflow, the available nodes may differ, but all compatible options are shown in the list.
> We cover node types and their behavior in more detail in the [Node configuration](/docs/Workflow/NodeConfiguration/NodeConfiguration) page.
When you are done building your flow, head to the **top-right corner** and click **Publish** to push the workflow live.
Need to check what changed or roll back to an older version? You will find **Version History** next to the workflow name on the **top-left** — perfect for tracking edits as your workflow evolves.
***
## Test Mode
You can toggle between **Editor** and **Test** mode at the top of the screen.
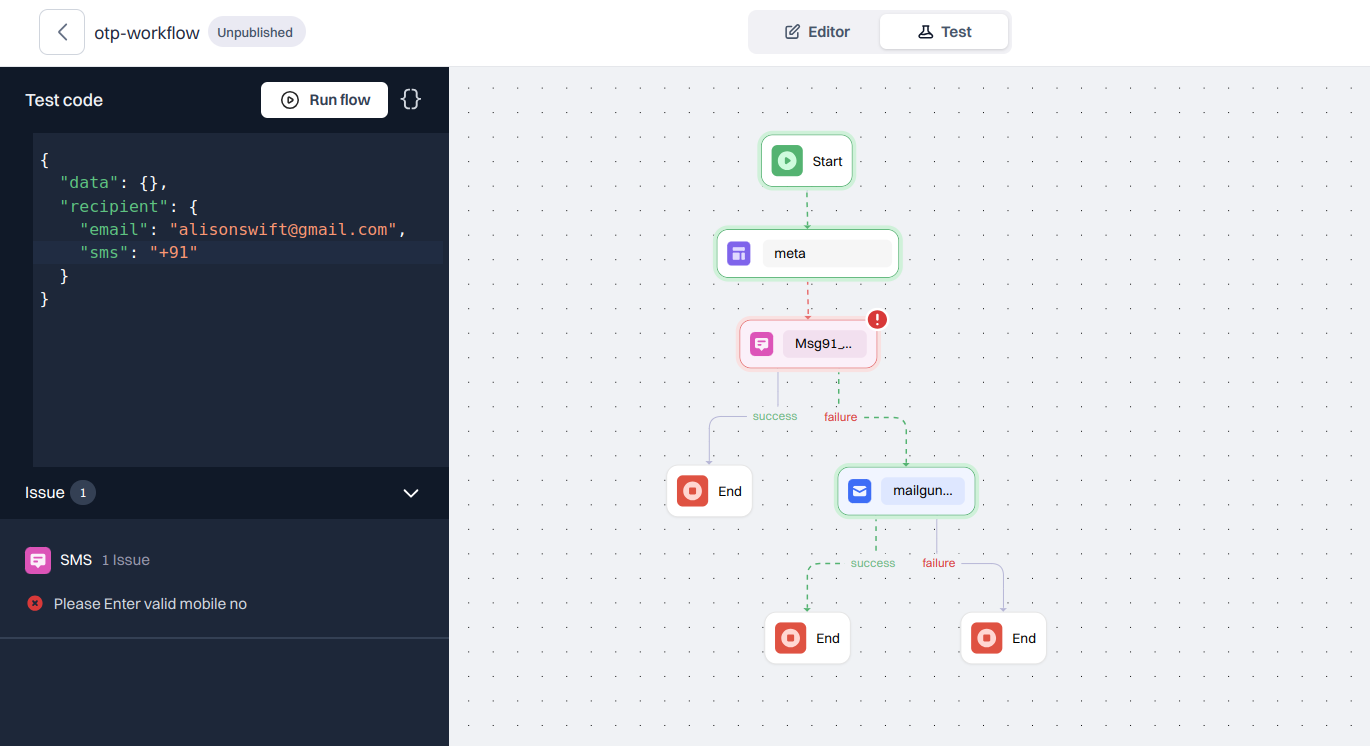 * **Editor Mode** lets you build and edit the workflow.
* **Test Mode** allows you to simulate how the workflow would run using mock data.
In **Advanced workflows only**, you will see a **Test Code** panel on the left. This lets you run the flow with sample values and observe how the logic behaves.
Click **Run flow** to test the execution path in real time.
***
### Input JSON Panel
Whether you are in Editor or Test mode, you will have access to the **Input JSON** panel.
* **Editor Mode** lets you build and edit the workflow.
* **Test Mode** allows you to simulate how the workflow would run using mock data.
In **Advanced workflows only**, you will see a **Test Code** panel on the left. This lets you run the flow with sample values and observe how the logic behaves.
Click **Run flow** to test the execution path in real time.
***
### Input JSON Panel
Whether you are in Editor or Test mode, you will have access to the **Input JSON** panel.
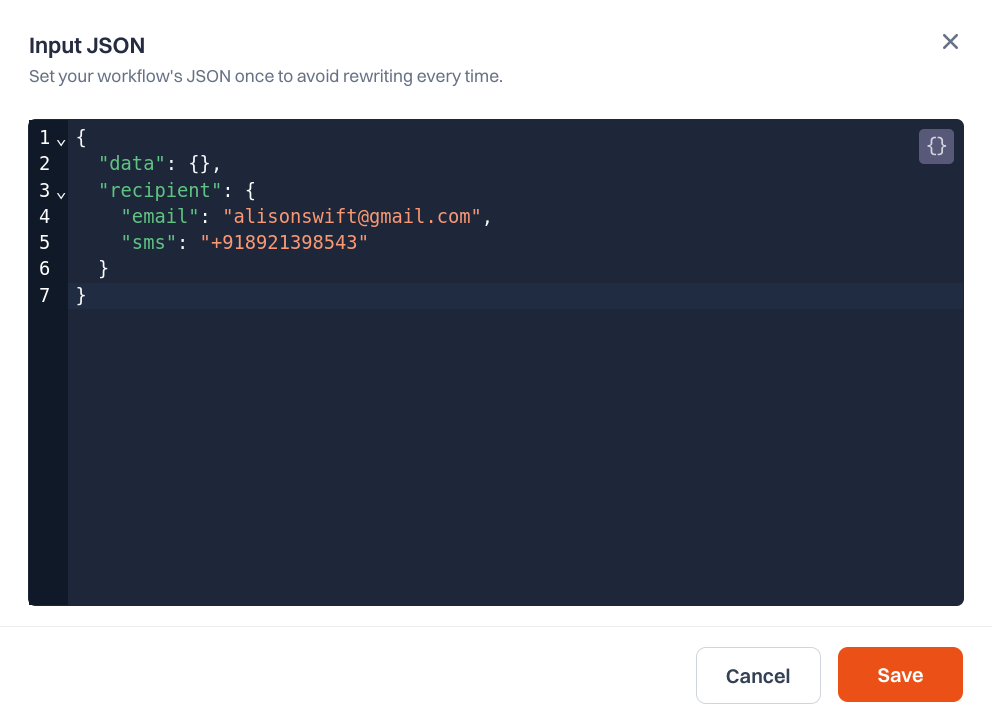 The input JSON is divided into two keys:
* `data`: Custom data used inside nodes or for conditions
* `notify`: Recipient details mapped to various channels
In **Advanced workflows**, this JSON is editable. You can update values in real time to simulate dynamic content or branching conditions during testing.
Here is an example structure:
```json theme={null}
{
"data": {
"name": "John",
"event": "OTP"
},
"notify": {
"email": "user@example.com",
"sms": "+911234567890"
}
}
```
The input JSON is divided into two keys:
* `data`: Custom data used inside nodes or for conditions
* `notify`: Recipient details mapped to various channels
In **Advanced workflows**, this JSON is editable. You can update values in real time to simulate dynamic content or branching conditions during testing.
Here is an example structure:
```json theme={null}
{
"data": {
"name": "John",
"event": "OTP"
},
"notify": {
"email": "user@example.com",
"sms": "+911234567890"
}
}
```