> ## Documentation Index
> Fetch the complete documentation index at: https://docs.trysiren.io/llms.txt
> Use this file to discover all available pages before exploring further.
# SendGrid
***Prerequisite:***
Ensure you have an account already set up in SendGrid.
 ## Integration Setup
To integrate your SendGrid account with Siren, follow these steps:
Go to the **Providers** section in your Siren dashboard.
Choose the **Email** channel from the available options.
Locate SendGrid in the list of providers and click on **Add Account**.
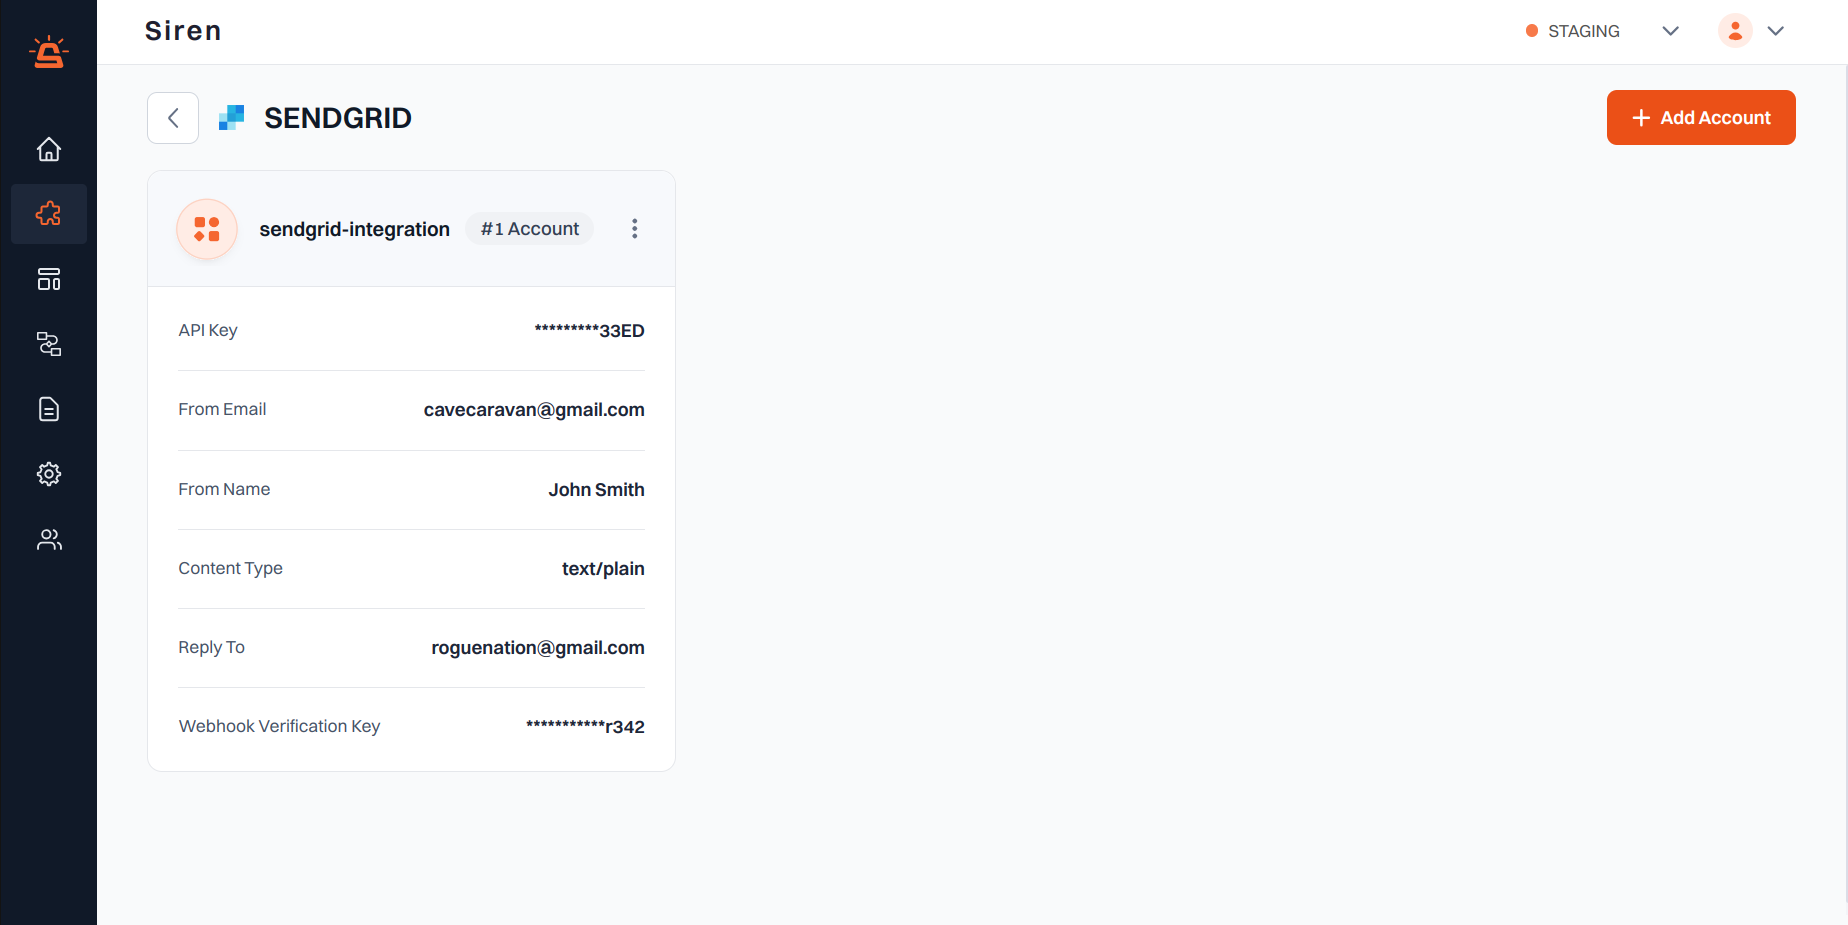
In the pop-up window, fill in the following details:
* **Custom Name**: Provide a name for easy identification within Siren's interface.
* **API Key**: Generate an API Key in your SendGrid account.
* Navigate to the **Settings** tab in the left-hand navigation menu.
* Click on **API Keys** in the sub-menu.
* Create a new API Key or use a previously generated one.
* **From Email**: Copy the Sender details from your [SendGrid account](https://sendgrid.com/en-us).
* Alternatively, add a domain or a single user on SendGrid and enter it into the "From Email" field in Siren.
* **From Name**: Enter the name associated with the sender's email provided in the "From Email" field.
* **Content Type**: Choose between **Text/Plain** or **Text/HTML** based on your email content format.
* **Reply To**: (Optional) Enter an alternate email ID for recipients to reply to.
* **Webhook Verification Key**: Enter the webhook signing key for your configured webhook URL from **Event Webhook** in **Mail Settings** under **Settings** in SendGrid.
* **Webhook URL**: Copy the webhook URL from Siren and paste it in the **Event Webhook** in **Mail Settings** under **Settings** in SendGrid. Ensure that all the events to track are checked.
## Integration Setup
To integrate your SendGrid account with Siren, follow these steps:
Go to the **Providers** section in your Siren dashboard.
Choose the **Email** channel from the available options.
Locate SendGrid in the list of providers and click on **Add Account**.
In the pop-up window, fill in the following details:
* **Custom Name**: Provide a name for easy identification within Siren's interface.
* **API Key**: Generate an API Key in your SendGrid account.
* Navigate to the **Settings** tab in the left-hand navigation menu.
* Click on **API Keys** in the sub-menu.
* Create a new API Key or use a previously generated one.
* **From Email**: Copy the Sender details from your [SendGrid account](https://sendgrid.com/en-us).
* Alternatively, add a domain or a single user on SendGrid and enter it into the "From Email" field in Siren.
* **From Name**: Enter the name associated with the sender's email provided in the "From Email" field.
* **Content Type**: Choose between **Text/Plain** or **Text/HTML** based on your email content format.
* **Reply To**: (Optional) Enter an alternate email ID for recipients to reply to.
* **Webhook Verification Key**: Enter the webhook signing key for your configured webhook URL from **Event Webhook** in **Mail Settings** under **Settings** in SendGrid.
* **Webhook URL**: Copy the webhook URL from Siren and paste it in the **Event Webhook** in **Mail Settings** under **Settings** in SendGrid. Ensure that all the events to track are checked.
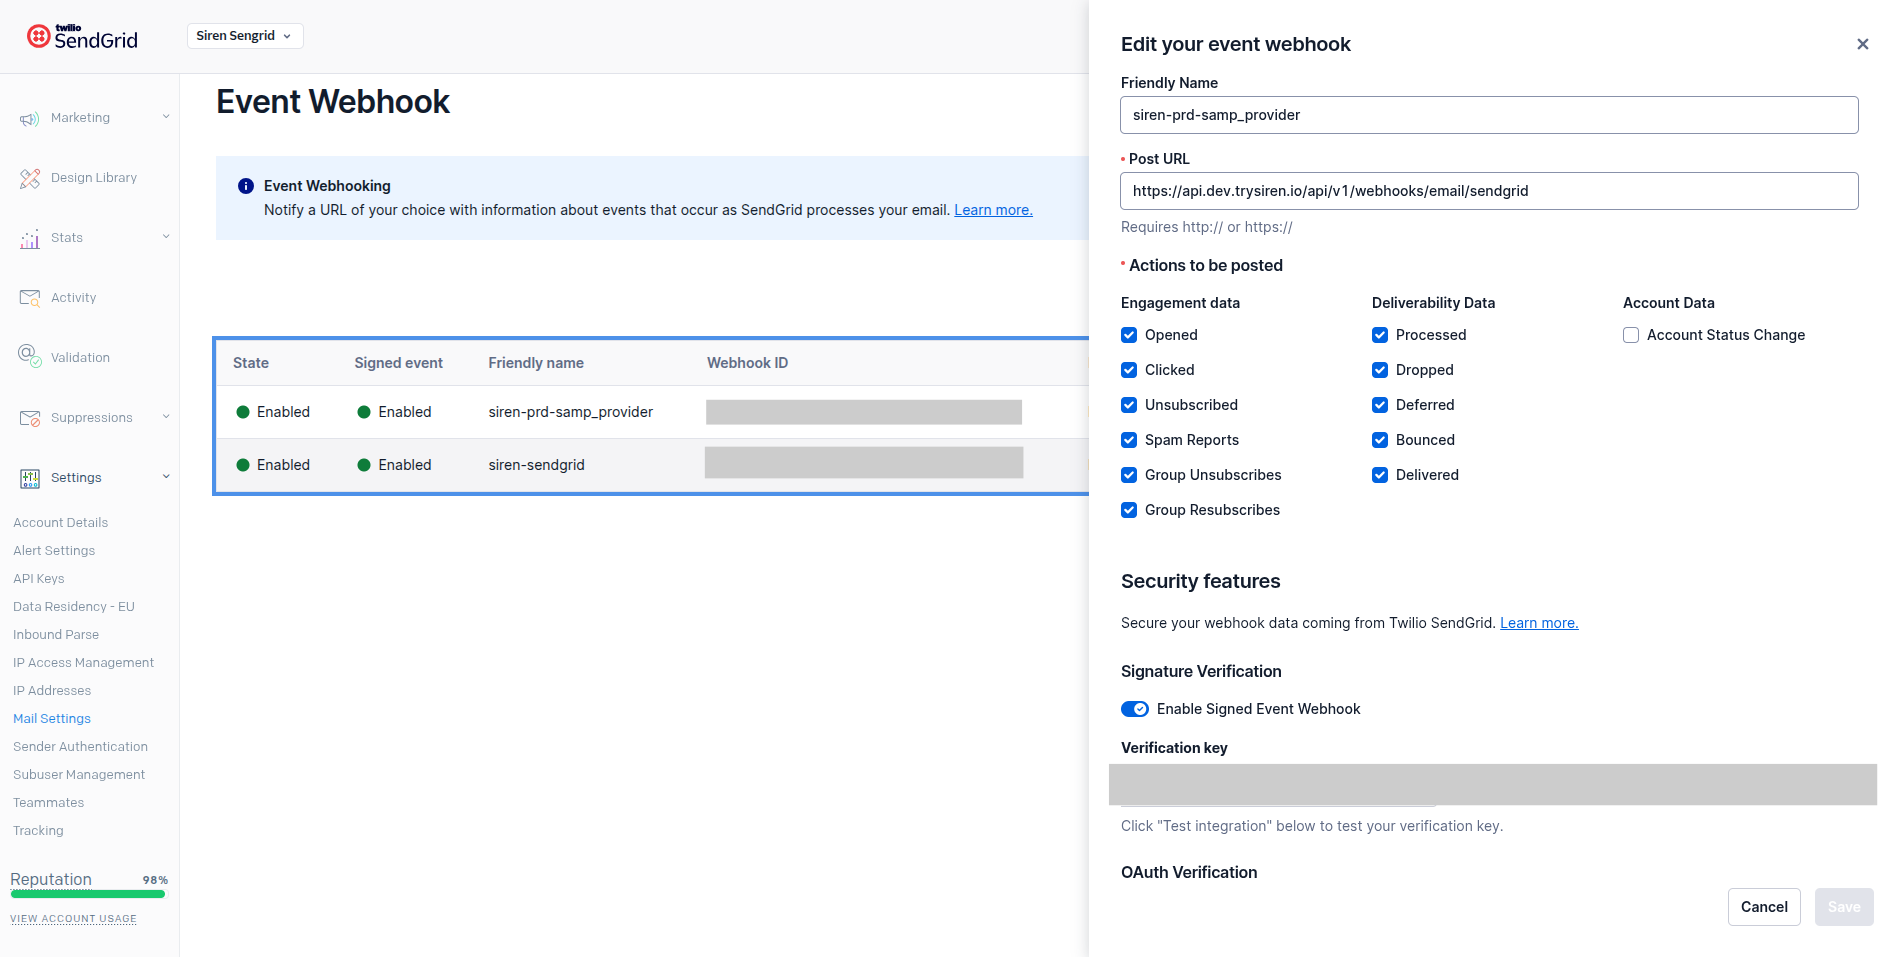 Click on **Save** to save your SendGrid account configuration. Come back to Siren and **Save** your Provider configuration.
By following these steps, you can seamlessly integrate your SendGrid account with Siren for effective email communication.
Click on **Save** to save your SendGrid account configuration. Come back to Siren and **Save** your Provider configuration.
By following these steps, you can seamlessly integrate your SendGrid account with Siren for effective email communication.